Supercharging your Autococker: The RJ Valve Mod
WGP Valve the has received the RJ Mod
So I made a new thing, and it's worked exceptionally well. I've done these valve mods for cocker valves, and so far in field testing the numbers on them have been extremely good for me.
Backstory - I make parts for cockers, and my kits for them that allow cockers to R/T and shoot basically full auto---mechanically. They shoot extremely fast for a cocker, let alone mechanical, and really push everything to their limits in the gun. These kits really got me into make a ton of custom parts for my own markers, to the point that I've made or mod'ed almost every part of the cocker on my own markers. The area that really suffered the most on these markers (R/T Cockers) is the valve. No matter what I was putting in them, the efficiency was god awful. We're talking 4x165 pods and a 260 loader for a 100ci tank.
That was using every spring combination and valve that I would get my hands on. I even reached out to my buddy Tim (Firpo), who is the other person who knows these markers well. He was landing in the same spot consistently, with both of us maybe getting 1 pod variance at most between the very best of the valves. All that until I ran into Simon's 11/16ths valve.
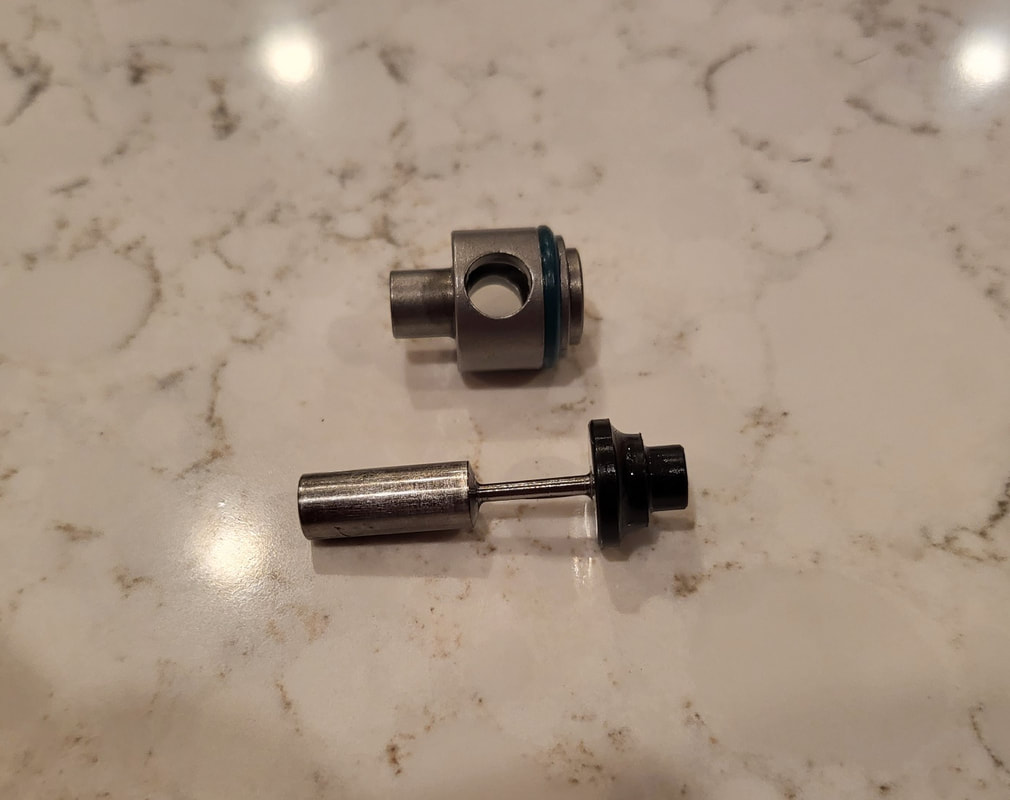
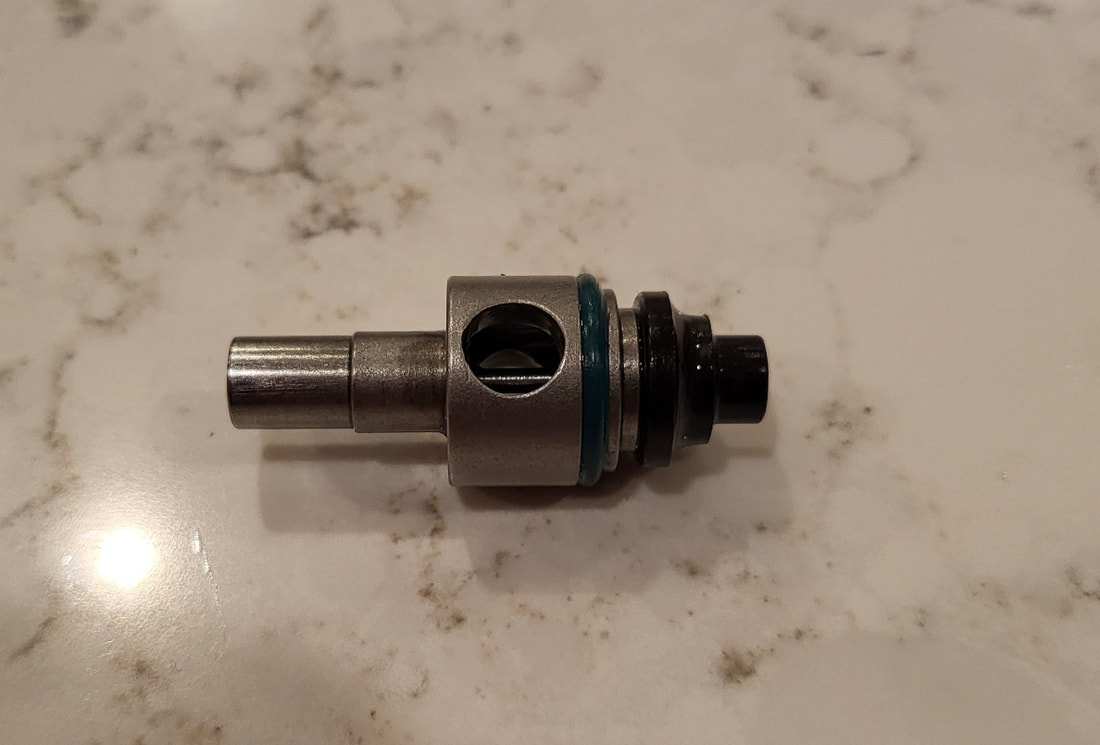
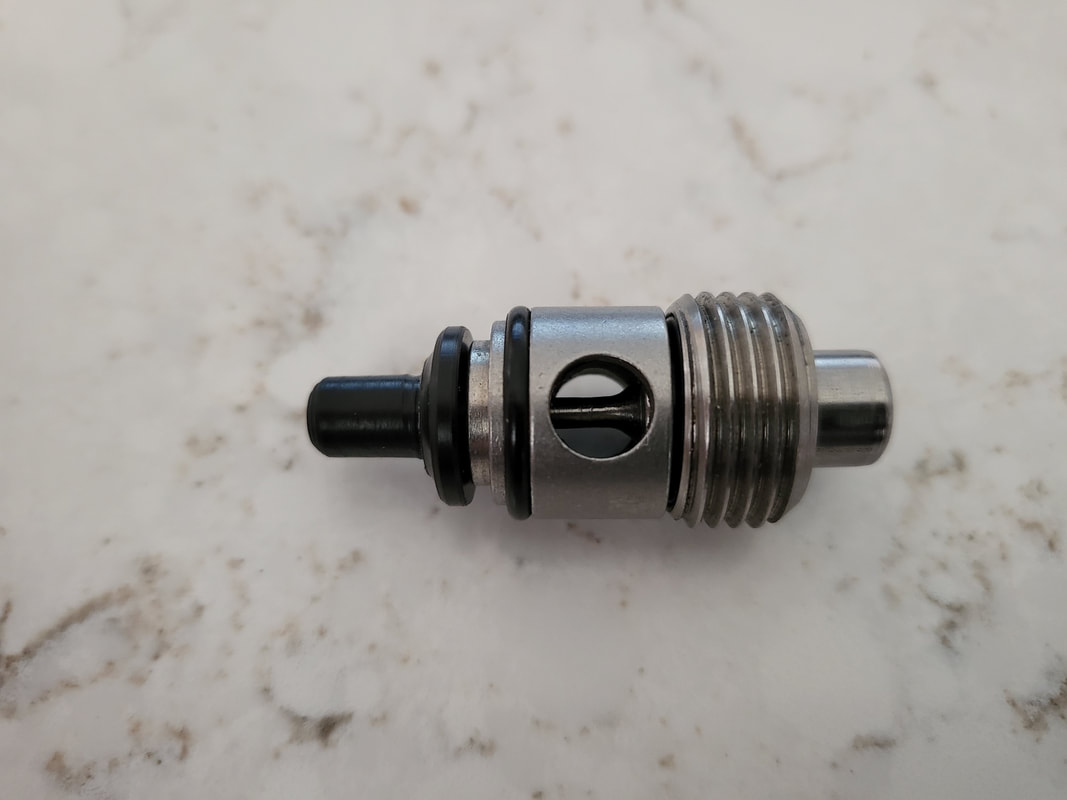
Valve Body and Stem
I remember the first time using it, and shooting my normal hopper and 4 pods out of my harness, and starting to walk back to the dead zone since I'd run out of paint. I figured, "Ok, paint and air---let's see if I have any air even left in this thing." I glanced down at my reg and saw 2k still in the bottle. I was shocked. Didn't make sense. So I shot through another full load, and got the same results. Did it again. It was consistent. Roughly doubled what I could get out of anything else.
So why is that? It's the design of the valve. Poppet valves essentially have two sails built into them. By sails, I am referring to an area of the part that catches the wave of pressure and uses it to move in a direction---like a sail on a boat. One is in the back of the valve, and something that everyone knows in the cup seal. It seals the valve shut, but also is a part that gets hit with the wave of pressure and uses it (along with your valve spring) to close the valve. The more surface area that's taking on that pressure, the more that the pressure is going to hit and close the valve faster.
The second sail sits at the front of the valve. Think turbo mods in the old days, or the pinnacle being Simon's 11/16th valve. Here, the valve stem is shaved down, and then expands out rapidly to become much wider. This sail also catches the wave of pressure and helps slam the valve shut. The bigger these two sails are, the less time your valve is open. Which means that you can become more efficient.
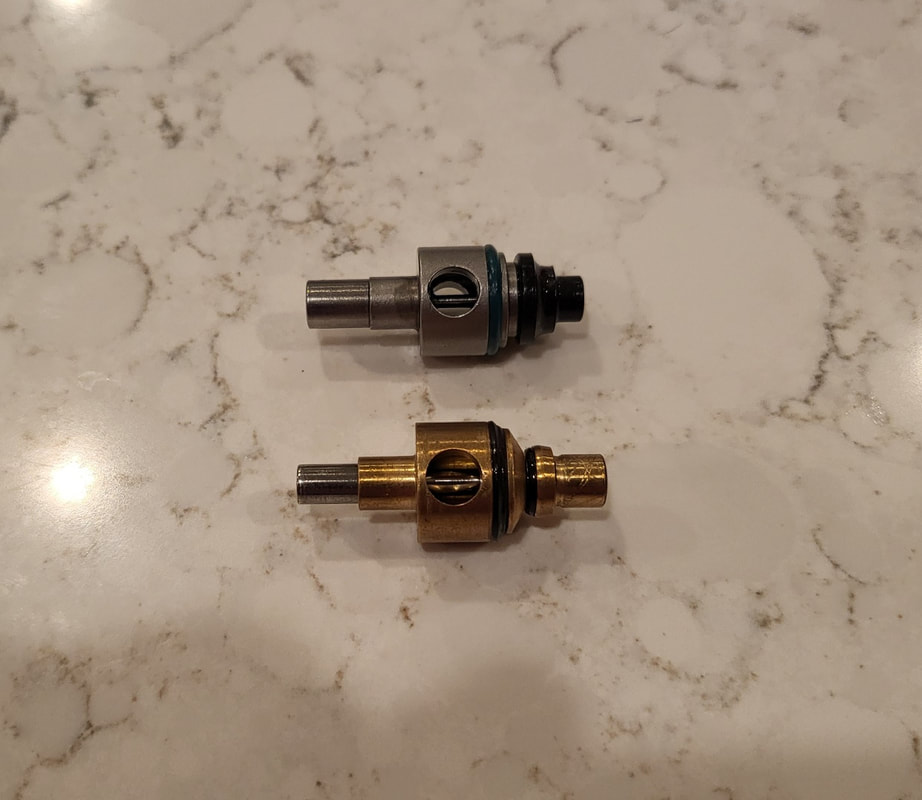
RJ Valve Mod side-by-side with a CCM Valve. Note the size difference in both sails
Simon's ID valve was kicking the crap out of anything I could find or do at 9/16th, which put some of my favorite markers in the crosshairs in terms of falling behind in usage. I mean I don't want to have to reload on air twice as much if I have better alternatives. So what was I going to do?
The answer that made the most sense was to apply the lessons from Simon's valves to stock valves, and see what happens. So off I went. I picked up some stock valves, and went to work.
So what exactly did I do? I tossed the stock valves in my lathe, and drilled out the valve stems. I figured out that you can, in fact, drill them out to 1/4". That will leave a paper thin guide tube for them, but that doesn't matter since that area really doesn't have to hold any pressure. The pressure is going through the exhaust ports of your valve, not really through there. Then, I went to work on making my own valve stems. The meant taking 1/4" stainless rod, turning that down to give you a narrow base for the shaft, and then making an up slope to the 1/4" diameter. This is the sail, and it's huge---not quite the size of the ID sail, but not that far off.
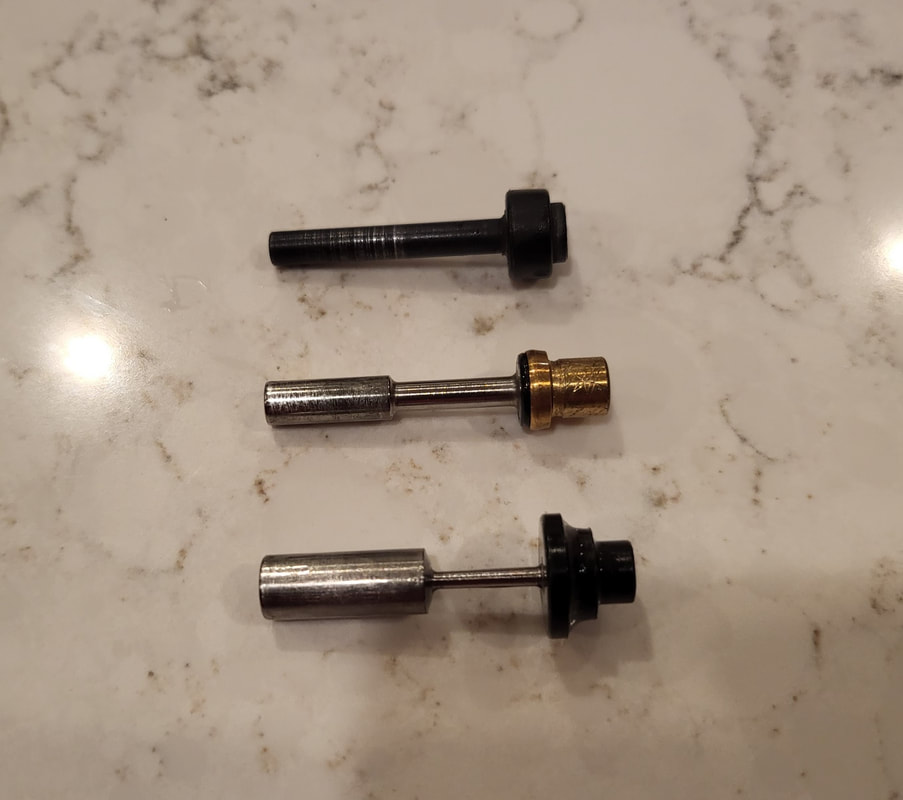
Stock, CCM, the RJ Mod, ranging from "Is it in yet?" to "It's splitting me in half"
Then I made oversized cup seals, much like a stock valve. Only I added sloping in there as well, to increase the surface area. Then, I screwed the stem and seal together, tossed them in oil along with the valve body and let them soak for a bit.
In case you were wondering, I did take this to it's logical conclusion and make a stem as large as I could and still fit it using the valve nut as the guide for said stem. The result was not making velocity because the valve would not stay open long enough. I also do need to note that the 1/4" set up does require heavier main springs and a heavy hammer, like a CCM or a Tall Boy. The extra mass and velocity by the heavier spring are what allow the hammer to open the valve long enough to work.
In case you were wondering, I did take this to it's logical conclusion and make a stem as large as I could and still fit it using the valve nut as the guide for said stem. The result was not making velocity because the valve would not stay open long enough. I also do need to note that the 1/4" set up does require heavier main springs and a heavy hammer, like a CCM or a Tall Boy. The extra mass and velocity by the heavier spring are what allow the hammer to open the valve long enough to work.
Too much of a good thing
Speaking of--- how did it work? Results so far have been really, really good. It has blown away anything I can find at 9/16th. While I am not quite catching Simon's gold standard in the 11/16ths valve in reaching 8 pods and an extended hopper---I am getting into well into a 7th. Considering the absolute most I was getting with other 9/16ths valves was into the 5th, that's one gigantic improvement. And that let's me use the 9/16ths sized cockers again without feeling like I'm missing out because of my choice to use them.
And I do want to give credit here where credit is due. Simon was a big help in the mod itself, as was my friend Ty McNeer. I spoke with both on the concepts on this, and then just really implemented them. They both helped a ton, and it's let me breathe some life back into some older markers that I love. And I thank both for that!
And I do want to give credit here where credit is due. Simon was a big help in the mod itself, as was my friend Ty McNeer. I spoke with both on the concepts on this, and then just really implemented them. They both helped a ton, and it's let me breathe some life back into some older markers that I love. And I thank both for that!

The valve that powers this lets me shoot the old girl without a second thought
