HOW TO: DYE PAINTBALL'S PLASTICS*
*some restrictions may apply
*some restrictions may apply
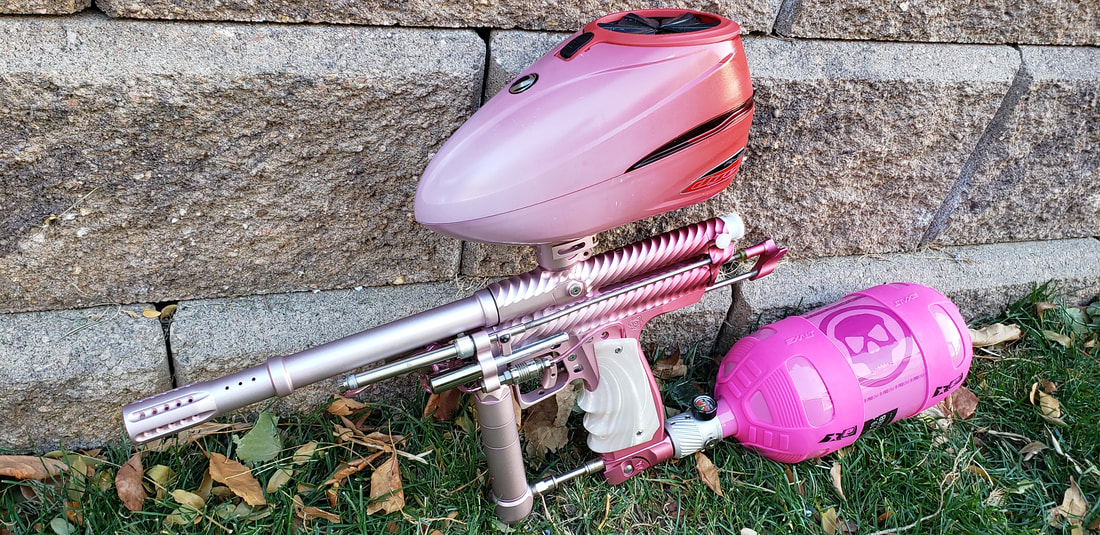
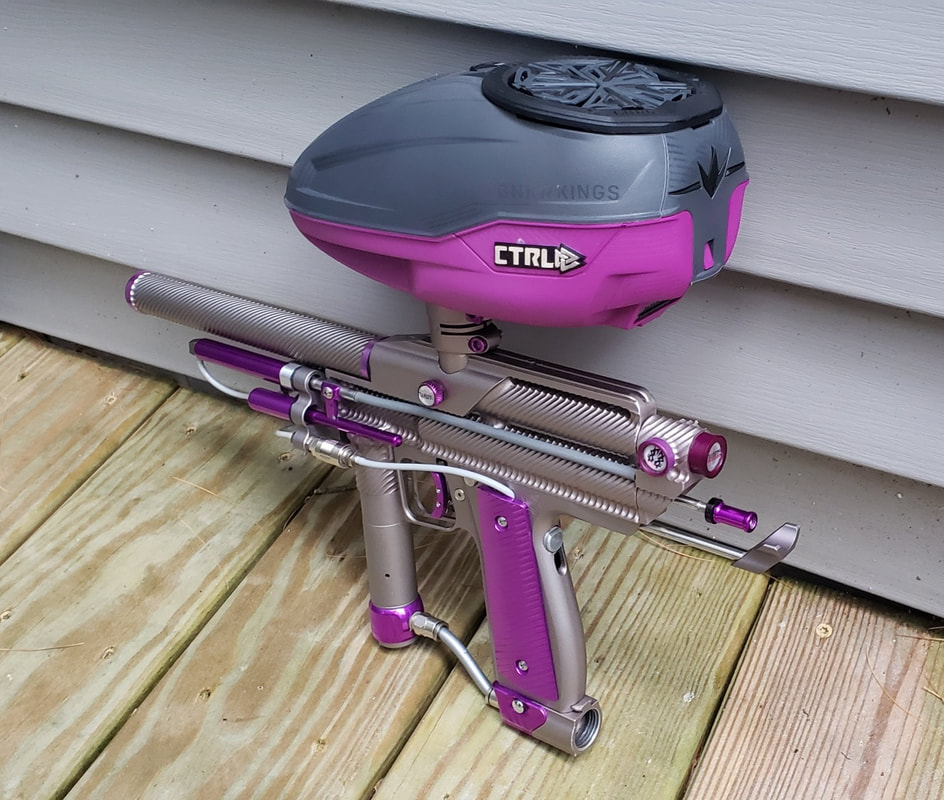
Dye doesn't make a pink loader, but they DO make white
So, if you're like me, you may not always want to just get what you're given. You might have your own style, like things to all match together, and to look like there was any sort of forethought put into what you're carrying on the field. When you see a clown or Frankenstein build out, your first thought is the person achieved their goal: They look like a goddamn clown.
Companies do their best to give you options, but they can't cover the entire spectrum. So what do you do? Well, if it's a plastic, strap on a pair and get ready to do it yourself.
It might sound like a throwaway line there when I'm saying strap on a pair. I am not. That marker in the top picture is a prototype, and the body alone is several hundred dollars, as was the ano job. They're both sporting a kit that I made myself, and that there was no guarantee that it would work. The loader itself was also a couple hundred. The reason I bring this up is not that to say that I'm spending a ton. It's to let you know that I was comfortable risking that money for something that might not turn out right.
So understand, right off the bat, that there is inherit risk in doing this custom work. And that's my disclaimer for ALL of this. Once you start a project and get into it, understand that there is a risk, that you'll need to be 100% in, and that it may or may not turn out as you hoped. In other words, while I'm telling you how to do this, I am also saying DO NOT DO THIS IF YOU ARE NOT COMFORTABLE WITH TRYING IT OR WITH IT NOT TURNING OUT EXACTLY HOW YOU WANT. I am not responsible for you screwing you your rotor, etc, or you hurting yourself because you can't be trusted with hot water. If you do that, it's on you.
Also, you'll need to be okay with it being, 'Good enough.' Different materials are not going to color the same, have the same finish (gloss versus dust), or match completely. There are a ton of factors involved. Try to match expectations with the reality that your anodized metal is not going to perfectly match your dyed plastics 100% for color, texture, and how they appear in all forms of light. Get that right out of your head now.
Where to Start
Now that we have the disclaimer out of the way, let me tell you the process itself. First, figure out what you want to dye. Understand this---you can do lighter to darker, but not the other way around. Also understand that the base color will absolutely effect what the finished product looks like.
Now that we have the disclaimer out of the way, let me tell you the process itself. First, figure out what you want to dye. Understand this---you can do lighter to darker, but not the other way around. Also understand that the base color will absolutely effect what the finished product looks like.

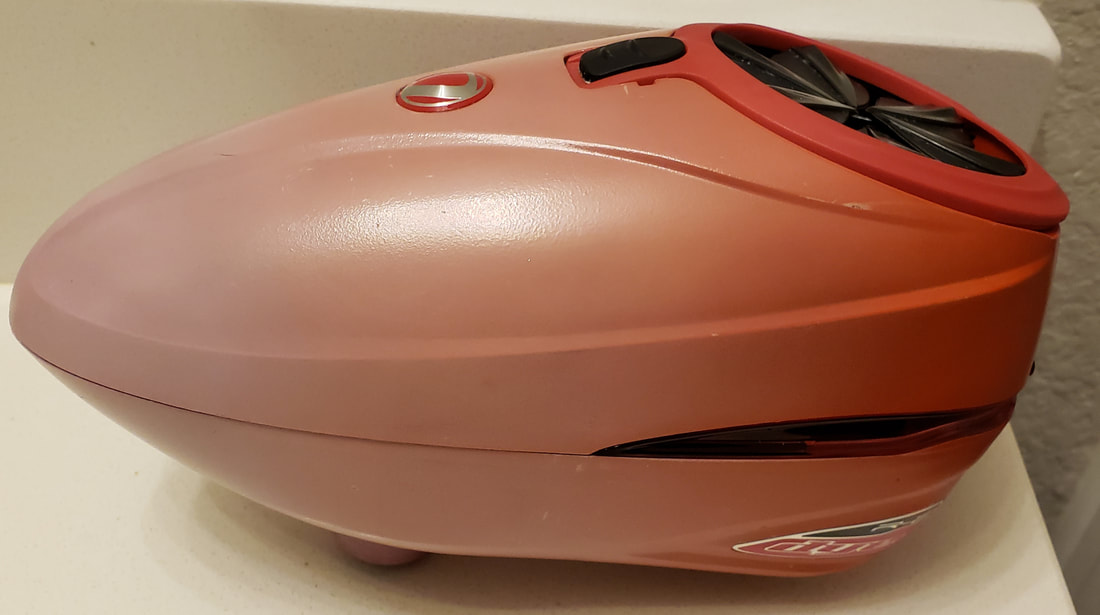
The best canvas for you is white/colorless
What I mean here is that you want to go with white if you're going with light colors if remotely possible, and that if something already has a dye in it, you have to treat that as part of your existing color pallet. In other words, if you want to dye something red to blue, it won't happen. You already have one primary color in there, and you're mixing with it. But, if you want to turn that same piece a purple, you can just add blue to it.
If you want to turn something black, you can use damn near any starting point you want. My advice there is go with the cheapest option available, because that will absolutely take out whatever starting color you have anyway.
If you want to turn something black, you can use damn near any starting point you want. My advice there is go with the cheapest option available, because that will absolutely take out whatever starting color you have anyway.
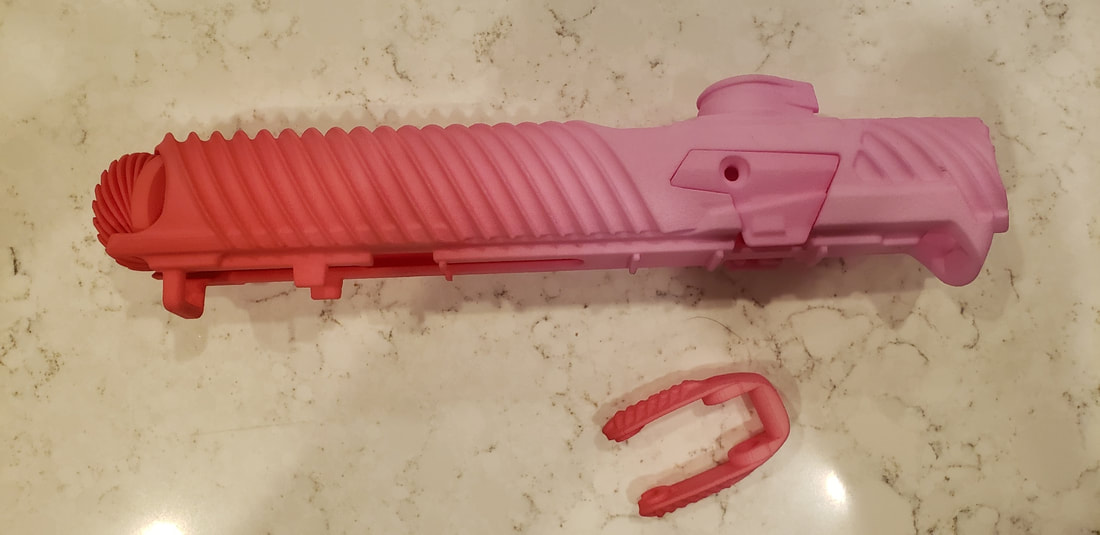
Same piece as above, after I dyed it
What You Need
So now that you have your starting piece, what else do you need to do? Well, a few things. First, go to Rit's homepage and look for their DyeMore for Synthetics. This is the dye that I'm using, and talking about how to use there. It also has a good how-to in their pages, as well as a mixing formula guide. LOOK AT IT.
The other things that you'll want are a pot to boil water in, a stove top, salt, dishwashing soap, and a stirring spoon. You may also want rubber gloves, wire or string to suspend your piece, and make sure that you aren't pressed for time. The process's time can vary wildly, so you'll want to be paying attention and not doing 10 other things.
Prep Work
If you have all of that, the last thing that you'll need to do is actually prep what you're dying. Clean the thing. I don't care what the thing is. Clean it. Gunk can potentially change your color, absorption, or block your piece from taking color all together. Spend time on this.
Any residue or objects on the thing that you are dying can block the dye from getting where you want it, which will cause bad results. This also means taking off any films on the plastic and taking any extra parts like badges or stickers. Those are actually masking your piece, and you won't get a color change there (unless that's the plan).
Getting Started
Okay, so you have your pot, dye, stirring spoon, salt, dawn, and thing. Now what?
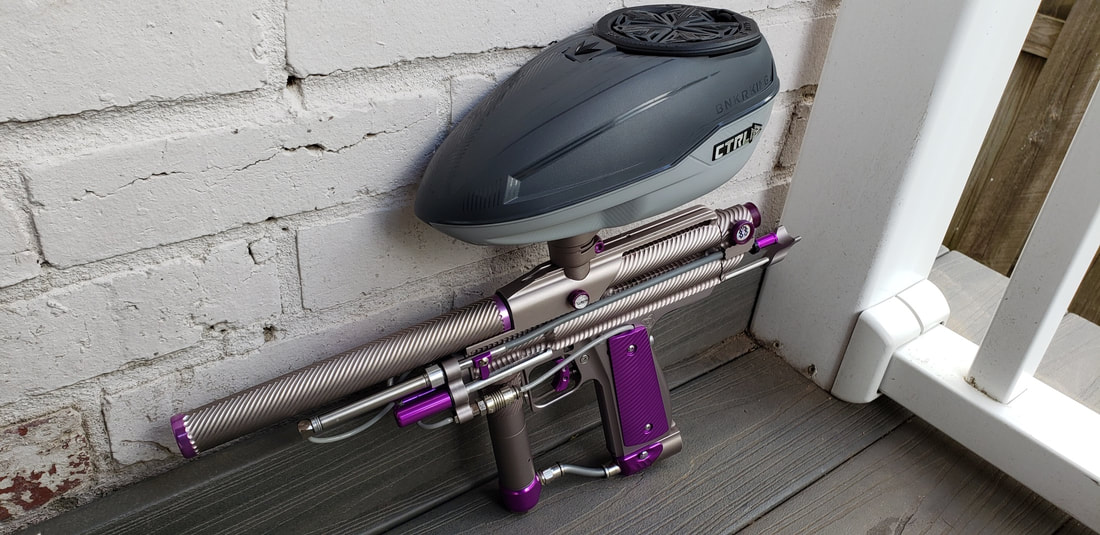
CTRL: Before
And the bolt and pin didn't dye themselves. From white to purp.
Go to RIT's color formula guide, or decide if you want to just wing it. Your call here. I would recommend at least looking at it and trying to find the color you want and the mix you need to get there. If you want to play by ear, you can do that too, but it is a bit riskier, and I wouldn't recommend it.
Take whatever color you like, and multiple it by the amount of water you plan on using. There's a drop down that list different amounts per object type. I usually use golfball or whatever appears to be hardest in that menu, since I know that I'm usually dying something a bit larger and denser in terms of plastics.
Fill your pot with water, and toss it on the stove. Get that puppy up to a boil. Put in a pinch of salt and a splash of dawn. I know that sounds a bit odd for things to add in, but don't forget them. They actually both will help with color absorption. Then add your color appropriately.
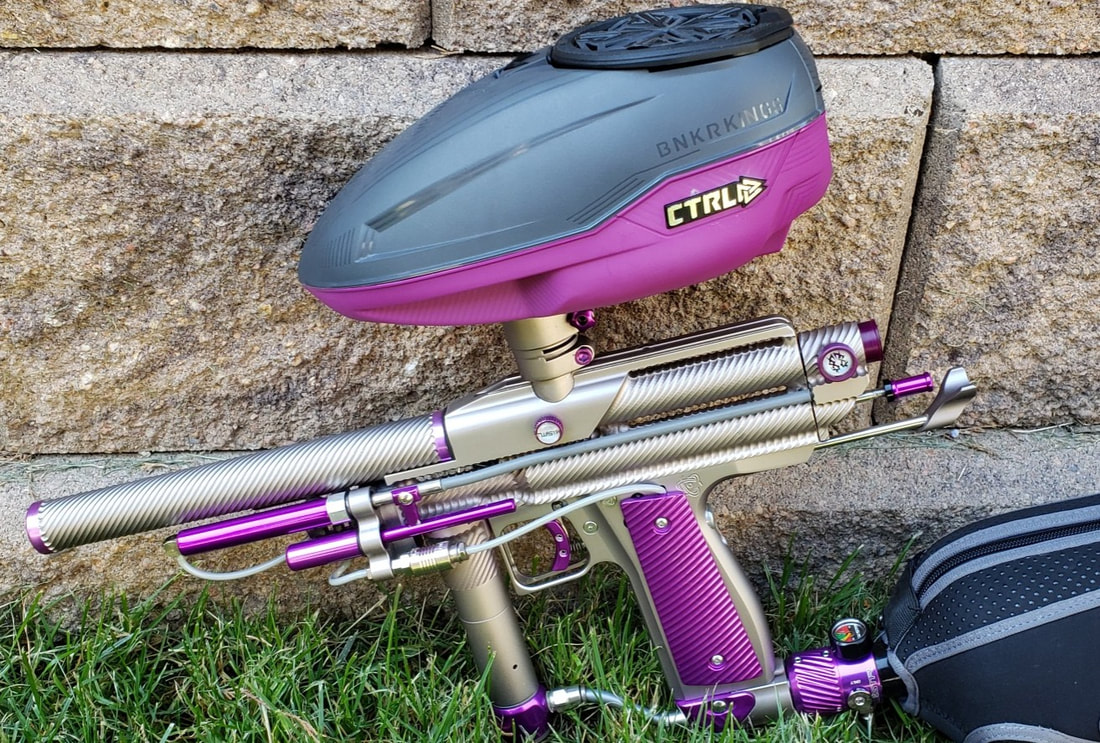
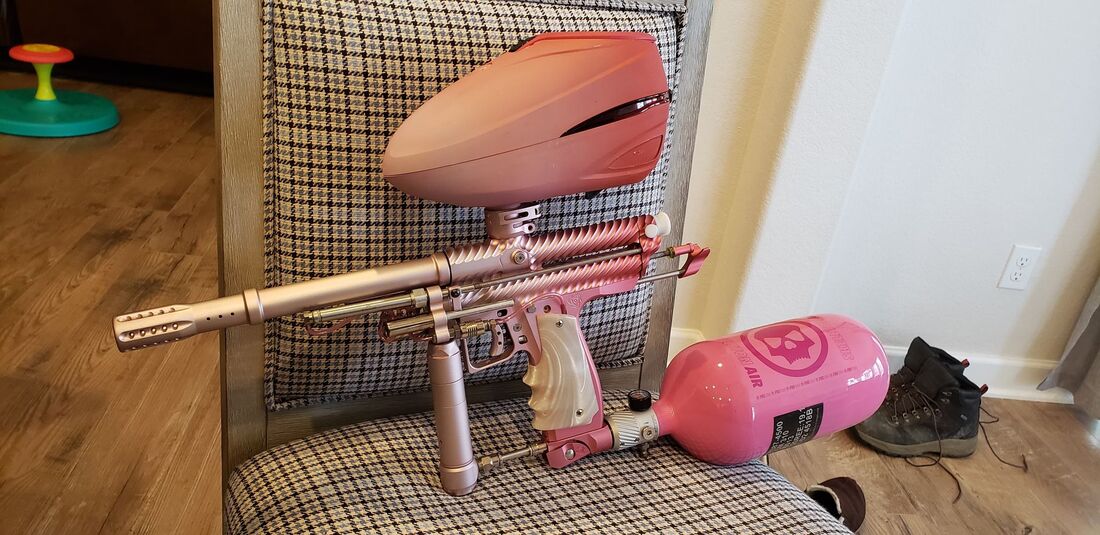
CTRL: After
Everything is In. Now what?
Stir your water and color while it gets up to a boil.
Yes, a boil.
You can slightly under that, but not much. You want it at least bubbling to the surface. Heat is your friend here. If you're worried about burning yourself, use wires like I mentioned earlier and suspend your piece. But you need it hot. Again---I am not responsible for you hurting yourself here. If this scares you, don't do it.
Place your piece or pieces in, and keep stirring if you can. Make sure that they are fully submerged, which can be a bit tricky since a lot of plastics like to float. You need them fully submerged in order to take the color evenly. You're stirring for the same reason.
Watch the color and feel free to lift the piece out to check it. It will not look the same out of the water as it will in the water, which is why I am telling you to pull it out and look at it. Don't panic early on if it just looks white with a slight hue of whatever color you are dying it. That's normal. It just takes a while sometimes for the plastic to really start absorbing the color.
That bolt and bolt pin were both white to start life
Keep checking color as your go until you're where you want to be. The longer you leave it in, the deeper the color and the darker it's going to be. Know this. The color that you see when you take it out of the pot is going to appear lighter than how it will dry! Again, it will be lighter!!
As it dries, it's going to darken slightly. It'll just darken a shade or two, but it will change. Know this prior to stopping! Also know that you can also toss it back in if it's too light for your taste, or the color isn't as even as you'd want. You can correct some errors this way.
Just also know that you can't go back and make something lighter. Once it's darker or the color is deeper, you aren't lightening it. The rule of light to dark, but not back applies here as well.
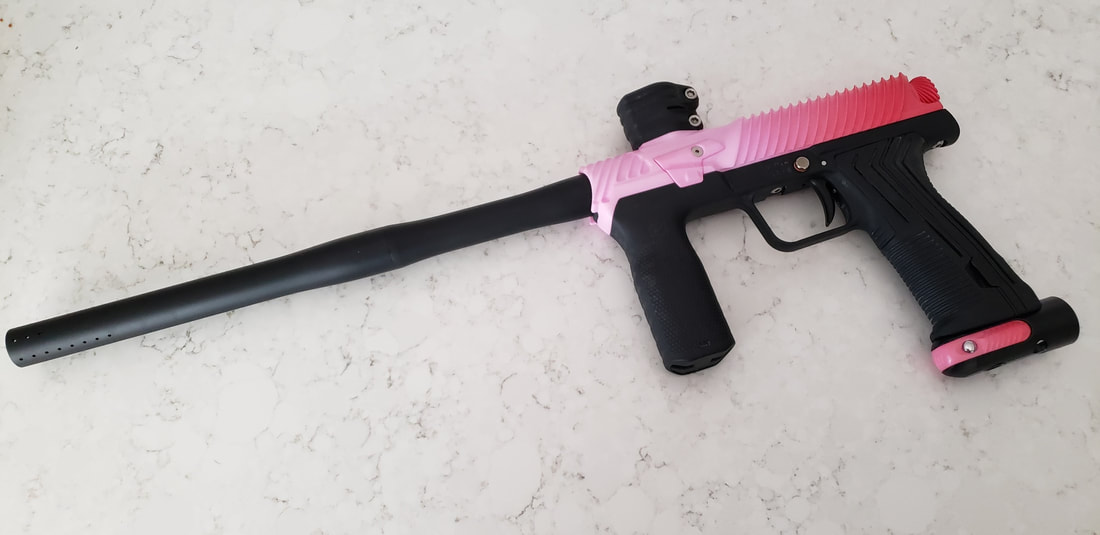
Fade prior to clear coat and re-badging
Clock Watching
So can set this up and walk away, and then come back whenever?
I absolutely would not. First, I wouldn't want you to overflow a boiling pot or burn your house down. Secondly, plastics all very wildly in how long this can all take. See that CTRL from earlier in the article? It took under 5 minutes. See the Rotor above the last two paragraphs? Literally over an hour. Varies. Wildly. So pay attention. There's no set time limits on this.
Finishing school
Some plastics can just be rinsed off in regular cold water after you pull them, dried, and you're good to go. Others may need a clear coat to keep from staining. Again, I'm going to have a not-so-helpful answer on that, as it depends.
The bolt and bolt pin in the above cocker have never needed any type of protection to kept them from staining. They're a dense delrin, and tough as nails. They have had paint all over them with no trouble at all.
The emek body definitely will. It's porous, light, and 3D printed. It's getting a clear coat of spray paint to keep it from absorbing anything and making it easier to clean. So ask around, use common sense, and hit up google and facebook if you aren't sure. If you know the manufacturer, you may want to ask them as well.
Doing a Fade
So I've been asked how I did the fade on the twister emek body and the R2. Here's how.
Take everything I mentioned above, and get a little fancier. I took the body and wired it together with steel cable I had laying around from hanging pictures. Once I did that, I put the body into the pot vertically.
I let the base layer of pink take hold. Once it got there, I slowly added pink and red dye while lifting it out of the water, also slowly. I kept adding dye as I went, darker and darker, to get the colors that I wanted. I also didn't just stop and walk away, because I wanted a smooth fade and not an abrupt transition. Holding something in one spot too long will just give you lines. That's not what I wanted.
Once I got it where I wanted, I pulled it out. In the end, it came out quite nicely. I'm happy with the finished product. It's not rocket science. It just takes a steady hand and some patience.
When your R2 reaches it's ultimate form
Can I Do This?
I think most people can do this if they get over their fear and nerves, and try it. Know this. Odds are pretty good you'll screw up a few times. I know that I found out the hard way that Rit SuperPink is actually red if you just leave it in long enough. It might not go right the first time, so use scrap material a couple times to practice before risking a $150 loader. But once you get the hang of it, it's not too hard and can come out looking great. So good luck, have fun, and I look forward to seeing other people's cool stuff soon!
I think most people can do this if they get over their fear and nerves, and try it. Know this. Odds are pretty good you'll screw up a few times. I know that I found out the hard way that Rit SuperPink is actually red if you just leave it in long enough. It might not go right the first time, so use scrap material a couple times to practice before risking a $150 loader. But once you get the hang of it, it's not too hard and can come out looking great. So good luck, have fun, and I look forward to seeing other people's cool stuff soon!
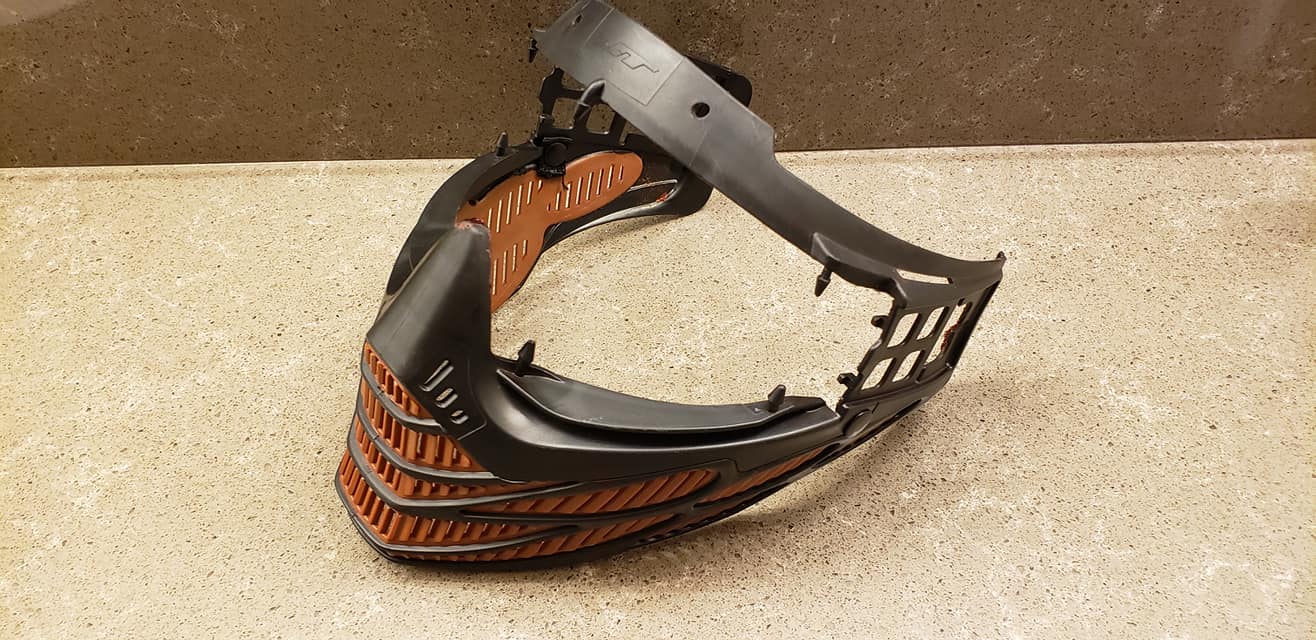
Yep, you can do masks too. From grey vents to brown using pink, red, and light blue dye.
